
Showcase
Overview
This resource pack allows entities to have animated shader effects baked into their texture. In many ways, it's a vanilla-friendly version of the Entity Texture Features mod.
This pack is designed to be used in conjunction with other resource packs that add textures with animated effects. Shader data is embedded into a texture file, and when the VESE shader reads that texture file, it will display the encoded effects. Because of the nature of the encoding, texture files can have a static fallback texture that can be displayed to the user if they opt not to turn on VESE.
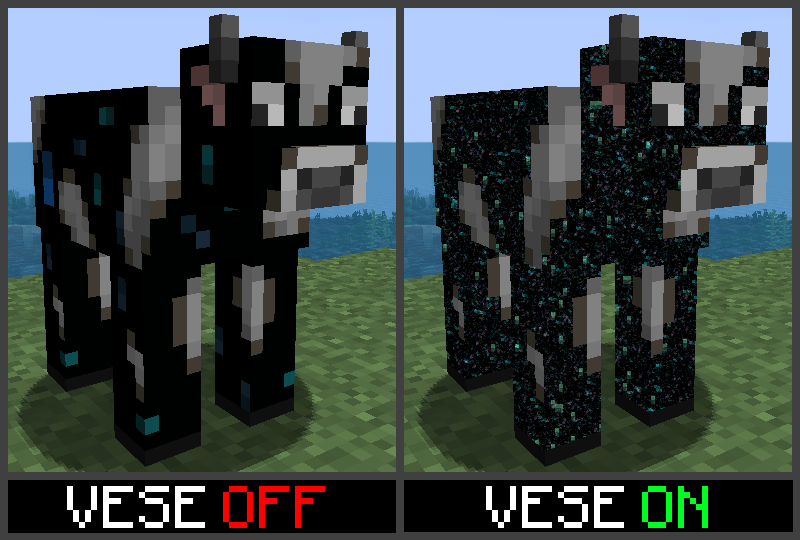
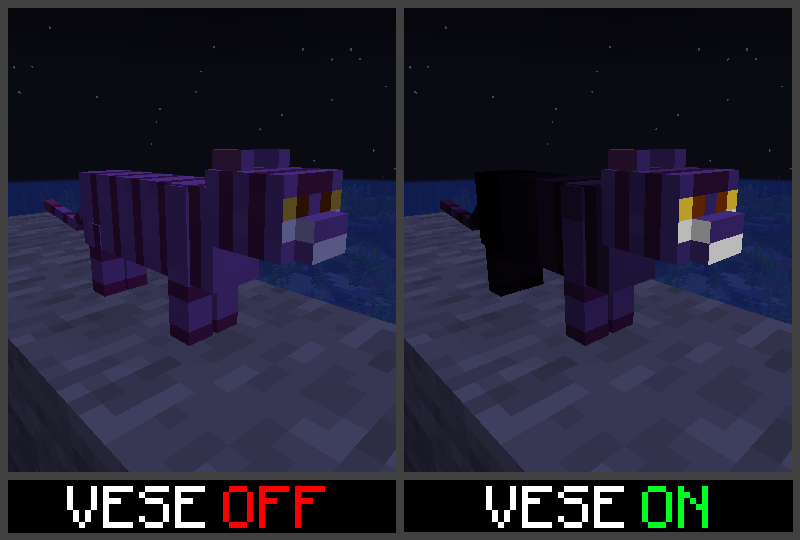
For example, the textures below are for a resource pack that adds void cows. The resource pack that adds void cows to the game shows the texture on the left if the player does not have VESE enabled, while it shows the texture on the right if it is:
VESE also works with player skins! If you update your skin to use VESE effects, it will still render as a normal skin to other players without VESE enabled, but will show the effects to anyone who does have it enabled.
Texture Editor Webapp
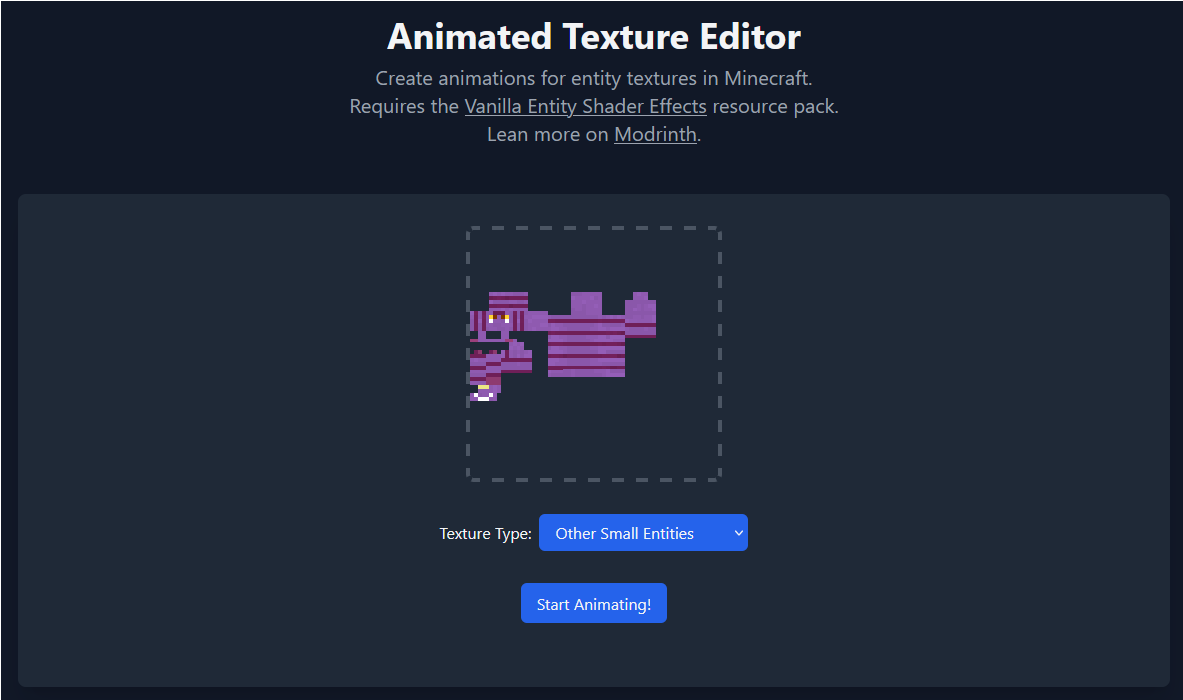
Shader effects can be added to textues with the with the Texture Animator webapp. To show how it works, I'll be creating an animated Cheshire Cat texture with glowing eyes and a body that fades to black from tail to head.
To begin, upload the base texture that you want displayed to users that don't have VESE enabled. The webapp will detect the texture size and provide a list of options for texture types. If the specific entity isn't listed in the available options, selecte the 'other' option for the given texture size:
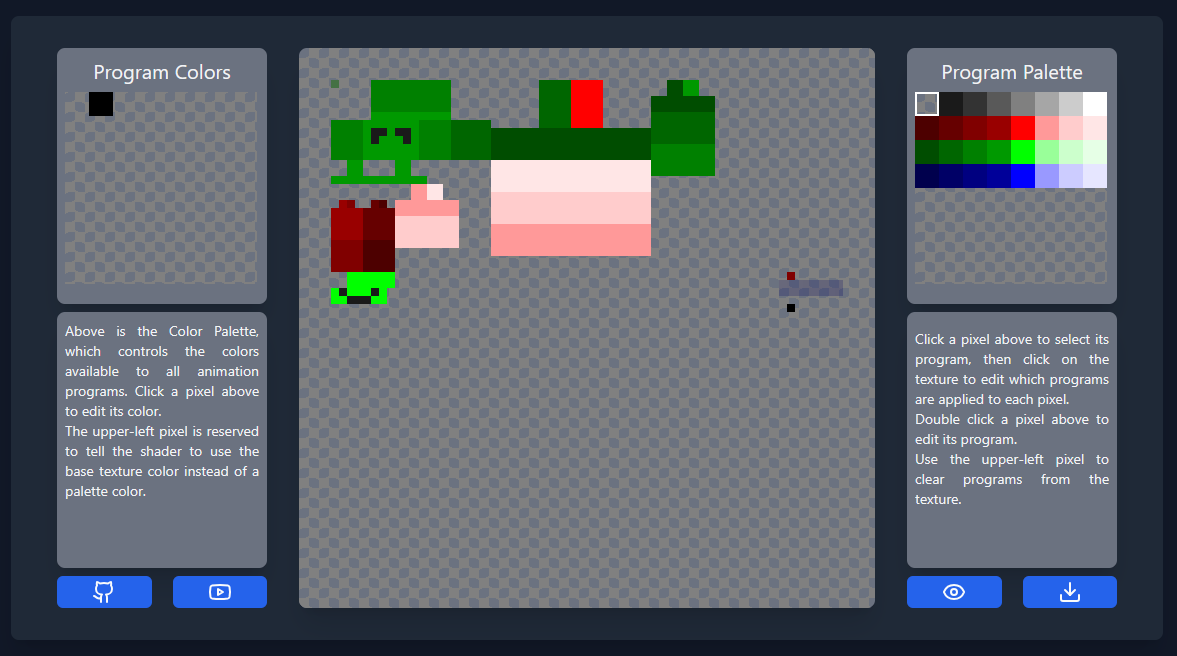
 Click 'Start Animating' to open the editor. The editor has three main regions - the Color Palette on the left, the Program Palette on the right, and the main texture in the center.
Click a pixel in the Color Palette to edit its color. These colors can be referenced later on by programs in the Program Palette:
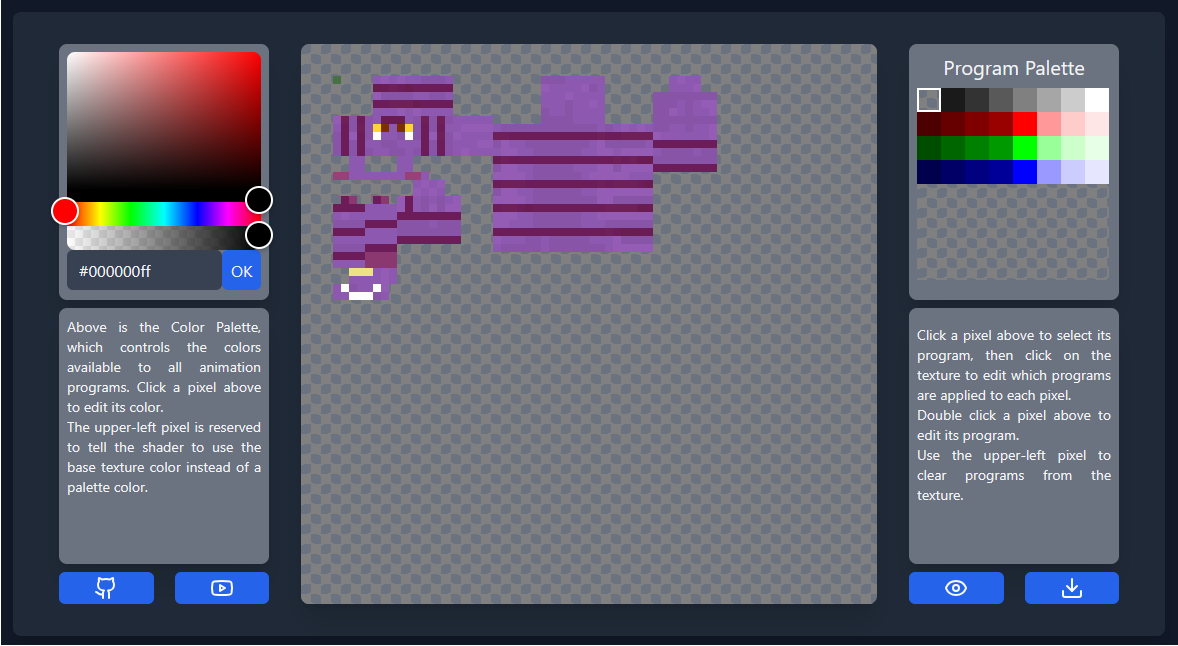
For most entities, you have access to 31 colors, though players have access to 63. As you edit the colors, you should see them appearing on the texture in an unused region. The upper left color in the palette is not editable, and tells the program to use the base color from the texture.
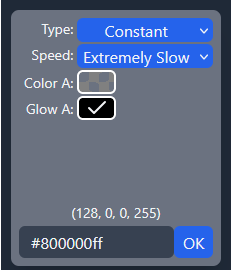
Double click a pixel in the Program Palette to edit its program. These programs can later be applied to any pixel in the texture. The first program we'll create is for the glowing eyes. By selecting 'constant' as the program type and checking the box that says "Glow A", we'll create a program that does nothing but make the existing color glow:
Click 'OK' to finalize the program, then click pixels on the main texture to apply the program. Use the upper left pixel in the program palette to clear programs from the texture.
Our second program will periodically fade between our fallback color and solid black. Double click the first program pixel on the second row. For this program, we'll select 'Sine Wave' and 'Normal Speed', then for color B select the solid black from our color palette. Set pause to '3' and leave offset at '0'. The resulting color code should be '#00016430'. Copy this value, then click 'OK'. The preview beneath the program editor should show a grid of colors fading to and from black.
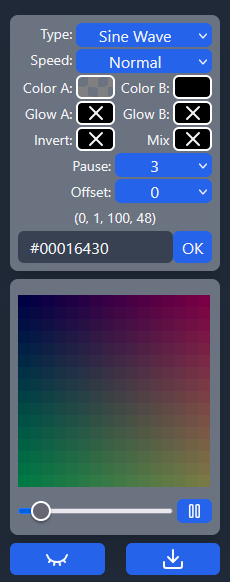
Edit the rest of the programs in the row, incrementing the offset each time. This will cause the fade on the program to start slightly later for each subsequent program.
Now, starting with the tail, add the programs to the pixels. Because of the length of the cat, we'll apply the same program to every 4 pixels. The end result should look something like this:
 If you want, click the eye in the lower right corner to get a view of what the actual texture will look like without the program overlay. Download the texture with the download button in the lower right corner.
Loading the new texture into our world, we can see what it looks like with and without VESE enabled:
90% of ad revenue goes to creators
Support creators and Modrinth ad-free with Modrinth+